Take the following steps to configure MIDI controllers in Buzz:
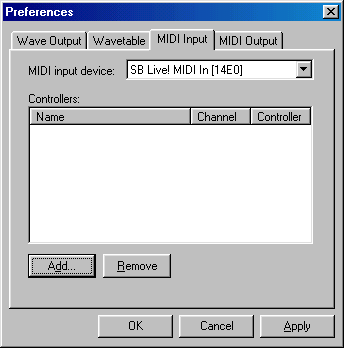
- First you must select an appropriate device from the list of available
MIDI devices. In most cases, the first listed will be your default device
and the device you wish to use. You may have other preference. If so
select it from the list now.

- To bind a controller to a name in Buzz, first click the Add...
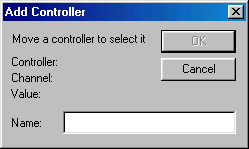
button pictured above. The following window should now appear:

- You will quickly notice that the OK button is grayed out. This is
because Buzz is waiting for you define a controller for which to bind.
You do this by moving any valid continuous controller on your MIDI device.
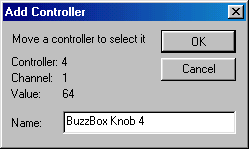
If your MIDI is functioning correctly you will see the controller number
and MIDI channel displayed as so:

- Clicking OK on the dialog above will bind the MIDI device. You may now bind MIDI to any parameter in Buzz.
The most common MIDI-controller is a plain MIDI-keyboard with a pitch control and a modulation wheel. Don't forget that you can use the modulation wheel for 128 different parameters by assigning it to different MIDI-controls. This assigning is done with your MIDI-keyboard, not with buzz. When you assigned another control to the modulation wheel, you can go through the former four steps again and thus re-use the modulation wheel for 128 different bindings.
Note: This process only needs to be done once per controller. After you have binded names to your controllers, you may bind controllers to them in any song. That song then saves the binding information so that you may continue to control the same parameter with the same controllers in the future.